Honda SUVs Earn Top Spot in Brand Loyalty
Honda's SUV lineup has claimed the number one position in brand loyalty among mainstream SUV owners, according to the J.D. Power 2024 Automotive...
Read more
As Honda recommends changing your new Accord's transmission fluid after six year's or 144-kilometres, (whichever comes first), it's unlikely that you will need this guide anytime soon. But, because these instructions apply to most Honda's and many other vehicles, you may want to keep it handy. Changing your Accord's transmission fluid is not difficult, and similar to changing your car's oil and does not need a Honda Service Specialist. Here's a simple step-by-step guide:
Transmission Fluid - 4.3 litres of Honda Automatic Transmission Fluid ATF-type 2.0.
Socket Wrench - A 3/8" drive standard socket wrench.
Mechanic's Creeper
Drop Cloth - You will want to protect your driveway as transmission oil stains concrete and blacktop
A Car Jack and Four Jack Stands - Jacking up the car is more work but, the extra room is worth the effort
An Oil Drain Pan
A Container for the Used Oil
A Funnel
Because draining transmission fluid works best when done on a level surface, you may either jack up the car and put jack stands under all four corners, or leave the car on the ground. Jack-stands will give you much more room to work, but they aren't an absolute necessity. Be careful not to confuse the oil pan for the transmission pan. The oil pan is located directly under the engine and has a drain plug at the rear of the pan. The transmission pan is located further towards the back of the vehicle, about even with the car's side mirrors.
The transmission fluid pan has a drain plug, on the side, which takes a 3/8 drive socket wrench with no socket on the end. You must stick the 3/8 drive directly into the plug. Loosen the plug in a usual manner. After several turns, you should be able to turn the plug by hand. Prepare for the fluid to shoot out at first - about ten to fifteen centimetres - so position the oil drain pan accordingly. Replace the plug when the oil finishes draining.
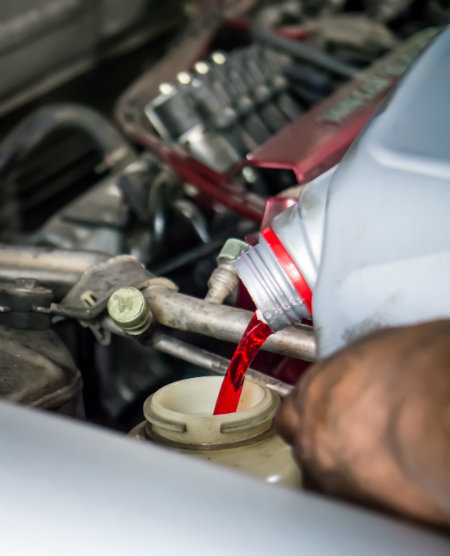
Locate and remove the transmission fluid dipstick. It will be on the firewall side of the engine and looks just like the motor oil dipstick but, with a yellow handle. Pull it out, place the funnel into the tube, and pour in the same amount of new fluid that you just removed from the pan and replace the dipstick. If you're in need of certified Honda transmission fluid our Honda parts department can help.
Step Four -Check the Fluid Level
Warm up the car (with it back on the ground). With the engine running and your foot on the brake, cycle through every gear waiting about three seconds at each. Next, pull, clean, replace, and pull the dipstick again. The oil level should be in the stick's crosshatch area. If it's still low, add oil in one-quarter litre increments. If it is too high, you will need to drain small amounts of fluid until you get the proper dipstick reading.
Many automakers do not put drain plugs on their transmission fluid pans because typically when the transmission fluid gets changed, the transmission fluid filter also gets changed. This procedure requires dropping the pan and draining the fluid anyway. Honda Motors puts a drain plug on their pans to simplify the process. It is recommended to change the transmission oil filter with every fluid change.
If you aren't confident in changing your transmission fluid do not worry! At Honda Queensway, we have a state of the art Honda service centre where one of our trained technicians will be able to change your transmission fluid. If your Honda is in need of a service, be sure to book a service appointment today!

Honda SUVs Earn Top Spot in Brand Loyalty
Honda's SUV lineup has claimed the number one position in brand loyalty among mainstream SUV owners, according to the J.D. Power 2024 Automotive...
Read more
Honda Previews New Off-Road Capabilities, Features and Accessories of the All-New 2026 Passport Trailsport
The 2026 Honda Passport Trailsport marks a new chapter in Honda's SUV lineup as their most off-road capable vehicle to date. This all-new model...
Read more
2025 Honda CR-V vs. 2025 Hyundai Tucson: Which Compact SUV Comes Out on Top?
The compact SUV market continues to be fiercely competitive, and two of the leading models for 2025 are the Honda CR-V and the Hyundai Tucson. Both...
Read more